CHAPTER 1
How To Hold Phone For Photo Shooting
How you hold the camera is also an important factor in getting a good photo. Since I will be shooting with the phone camera, it is a matter of how to hold the phone. Let's look at the pattern we hold.
The way we usually hold the camera. I don't want to say it's wrong, but it's not a good way to hold it.
Let's say we took a photo. It takes a while for the camera to open and light to enter the camera sensor. It is called shutter speed. When there is any movement during the darn period, the image tends to blur.
Because we have experienced that the photo we take is blurred. Here, even if we are shooting non-living things, our hand may move unintentionally during the time we press the shutter button (the time we take the picture). (Open the phone, take out the camera and take a picture carefully. Take a look.)
Even if we are careful and can hold it still, it is not always the case. The more difficult thing is when shooting in night mode, you have to hold it still for a long time.
Even if the phone in our hand uses stabilization technology to prevent the camera from shaking, the quality will not be as good as it should be. This is a good save for those moments that cannot be returned.
Another thing is that nowadays phones don't have only 1 camera anymore. At least 2 3 again. Because of the way we hold the camera, sometimes our hands hide the camera. Have you ever seen a picture of me hiding it with my own hand? (I've experienced this before. When I take a quick picture in the hot sun, I don't look back at the picture right away. When I get home, the picture is hidden by a finger, etc.)
Also, you will notice that the pictures taken with the phone mounted on tripods are more stable and clear. So, I would like to share a way to maintain stability, which is the most important thing in handheld shooting.
Let's separate our 2 hands into the hand that will hold the phone and the hand that will press the shutter. (Try changing hands as you feel comfortable.)
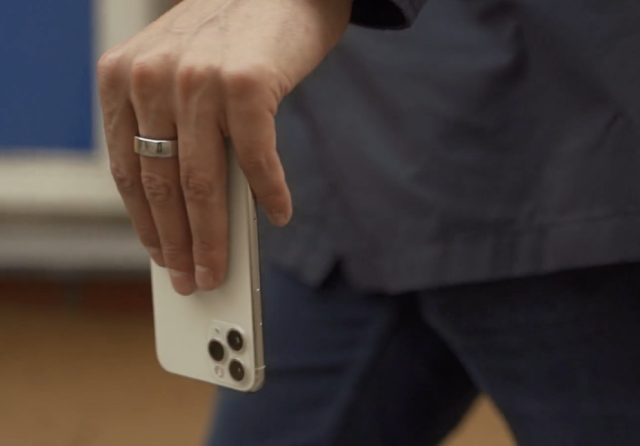
The little finger is held from the bottom of the phone and the thumb is pressed from the top of the phone. On the back of the phone will be the remaining 3 fingers.
This grip will allow us to hold the phone even when we are walking. When you get to the front, you will be ready when you have to shoot again. At the beginning of the trial, you may feel uncomfortable. It takes practice.
Hold the rest of the hand that will press the shutter as shown in the picture above. Only the thumb will be used for the shutter, and the rest of the fingers should support the hand holding the phone like in the upper right picture. Not only the shutter, but also the camera mode change. Try using that thumb for actions like zooming. It will not be easy for friends at the beginning of the transition. But I'm sure you'll be satisfied with the sharpness you get from it. If you've got the hang of it, let's move on to the next picture.
Usually, what I've seen is people taking pictures with their arms outstretched like hell. I also shot. The heavier the phone, the harder it is to hold. The greater the chance for vibration. If you hold it with the body as in the picture below, it will be more stable.
If you want to take a vertical picture, just hold your hand in the same position. There is no need to do each type.
For more stability when shooting while sitting, you can shoot as follows.
Also. Like we want to put our phone in our pants pocket, I also want to put it in my backpack, so my phone gets sweat or dust. Therefore, you will need to clean the lens thoroughly. If you have beach sand on your camera, it's best not to wipe it off with a cloth.
The contents of Chapter 1 are taken from iPhone Photography School (YouTube Channel).
Channel Link ==> https://www.youtube.com/EmilPakarklis/
In the channel above, you can see iPhone Photography including this content. Although it is for iPhone, some of the concepts are the same, so it is a useful channel to study.
👉👉👉👉👉 Click Here For Next Part👈👈👈👈👈
Thank Your for reading.
Khit Minnyo


0 Comments